Welcome to Guriddo Datetimepicker PHP
Introduction
Guriddo Datetimepicker for PHP is a server-side component built on top of open and widely used standards.
The Datetimepicker is a highly configurable plugin that adds datetimepicker functionality to your pages. You can customize the date and/or time format and language, restrict the selectable date ranges and add in buttons and other navigation options easily.
By default, the datetimepicker calendar opens in a small overlay onFocus and closes automatically onBlur or when a date is selected. For an inline calendar, simply attach the datepicker to a div or span or set inline option to true.
Features
- Static (inline ) calendar
- Flexible positioning
- Range of dates
- Timepicker
- Custom formating
- Custom buttons
- Wide range of methods and events
Requirements and Installation
Browser Support
Datetimepicker for PHP supports all modern browsers:
- Edge
- Fire Fox
- Google Chrome
- Opera
PHP
As from version 7.0.0 Guriddo Datetimepicker PHP is designed to work with PHP version >= 8.x
Installation via composer.
Datetimepicker class is part from the Giriddo Suito PHP/ Guriddo jqGrid PHP and in order to use it you will need to install the whole package.
- Unzip the archive in directory of your choice. After unzipping the directory will have the following content
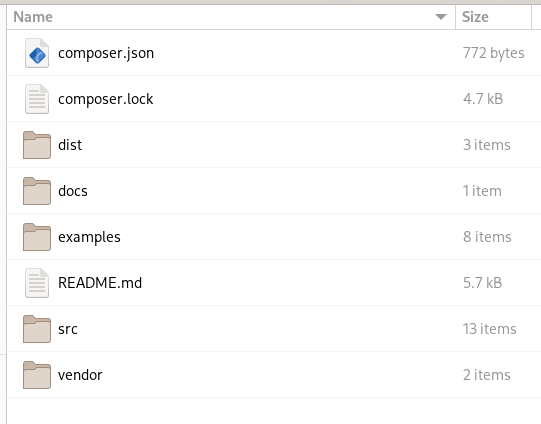
where:
dist directory contain javascript and css files + Visual Form builder code
docs directory contain documantation - both api and developers one
examples directory contain demo files
src directory contain all the Guriddo Suito classes
vendor directory contain autogenerated autoload file.
Attention
Currently there is no possibility to copy only certain directories when using the composer. It is recommended before to do anyting to move the following directories: dist, docs, examples and vendor to another place if you plan to use composer. Doing this go to the next step.
- In your project composer.json add the following item in repositories property
    "repositories": [
        ...
        {
            "type": "path",
            "url": "path_to/Guriddo"
            "options" : {
                "symlink" : false
            }
        }
        ...
    ]
    "require": {
        ...
        "guriddo/jqgridsuitophp": "^7.0.0"
        ...
    }
where the url should be adjusted to your needs. If you want to use symbolic link and not copy the files, change the symlink to true:
"options" : { "symlink" : true }
run the command
composer update
to update your autoload.php file.
In order to use Guriddo php lib in your project files point to your vendor/autoload.php file.
Installation without composer
Unzip the archive to directory of your project. This will create a directory Guriddo and other directories as described in the chapter above
In your project file do
require_once "path_to/Guriddo/vendor/autoload.php";
where path_to should be adjusted to your needs.
All the needed JavaScript and CSS files are placed in Guriddo/dist subdirectory, where in Guriddo/dist/css are the needed css files and in Guriddo/dist/js are the needed JavaScript files.
Of your choice, you can copy/move these files to other directory.
Installing packages for exporting
By default the installation comes without packages for the export (pdf and excel). These packages are placed into the suggest section of the composer.json file. In the directory of guriddo use the command to list these libs:
composer suggests --list
install these packges manually if you need the export to pdf and excel.
composer require tecnickcom/tcpdf
composer require phpoffice/phpspreadsheet
Quick start
After installing the php files it is necessary to know the location of javascript and css files which are located in dist subdirectory. This directory conatin two more subdirectories - js and css whith the needed CSS and JavaScript files.
For using only datetimepicker it is needed to load only one JavaScript and one css file. This mean that the calendar has no dependency. For compatibility with the other modules we will include the bootstrap files to.
<!DOCTYPE html>
<html>
<!-- bootstrap 5 -->
<head>
...
<link href="https://cdn.jsdelivr.net/npm/bootstrap@5.2.0-beta1/dist/css/bootstrap.min.css" rel="stylesheet" integrity="sha384-0evHe/X+R7YkIZDRvuzKMRqM+OrBnVFBL6DOitfPri4tjfHxaWutUpFmBp4vmVor" crossorigin="anonymous">
<link rel="stylesheet" href="https://cdn.jsdelivr.net/npm/bootstrap-icons@1.8.0/font/bootstrap-icons.css">
<script src="https://cdn.jsdelivr.net/npm/bootstrap@5.2.0-beta1/dist/js/bootstrap.bundle.min.js" integrity="sha384-pprn3073KE6tl6bjs2QrFaJGz5/SUsLqktiwsUTF55Jfv3qYSDhgCecCxMW52nD2" crossorigin="anonymous"></script>

<!-- datetimepicker -->
<script type="module" src="../vendor/dist/js/ext/air-datepicker.js"></script>
<link rel="stylesheet" href="../vendor/dist/css/air-datepicker.css">
</head>
<body>
......
<div class="row mb-3 g-3">
   <div class="col-md-4">
        <label for="start_date">Date Input: </label>
       <input id="start_date" />
   </div>
</div>

<?php include "demodate.php";?>
.......
</body>
</html>
Save the file as datepicker.php or any desired name in the root directory.
In the root directory you will find a file named jq-config.php. Open the file and enter the appropriate information for the connection to the database and path to the vendor directory. Save the file and then create a file demodate.php with the following content.
<?php
ini_set("display_errors",1);
require_once '../../../jq-config.php';

$dp =  new \Guriddo\Calendar\bs5Calendar();
$dp->renderCalendar("start-date");
Run the file datepicker.php from your web browser.
Using Logger
This feature is not available for datetime picker